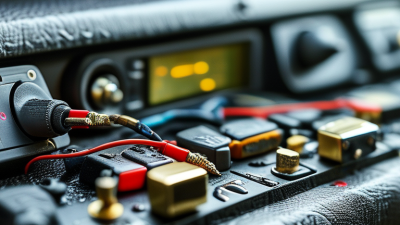
Choosing the right car audio installation kit is not simply a search for louder sound. Global buyers face different vehicles, climates, electrical systems, connector designs, and product-support standards. A kit that fits a 2024 Toyota in Canada may not suit a right-hand-drive vehicle in Australia. Small details matter, such as a 10-millimeter ground cable, a properly rated fuse, and an adapter that does not loosen behind the dashboard.
Andy Wehmeyer, a respected car-audio designer and industry educator, has stated, “The installation is the most important part of the system.” That principle guides this 2026 overview. Good speakers cannot repair poor wiring. A powerful amplifier cannot compensate for weak grounding or incorrect impedance. Safety matters, too.
No kit is perfect.
This guide compares practical car audio installation kits for international buyers. It considers component quality, vehicle compatibility, instructions, upgrade flexibility, warranty access, and installation difficulty. It also looks at real workshop concerns, including cramped dashboards, factory amplifiers, steering-wheel controls, and limited tool access. These issues are easy to overlook when shopping online.
Our recommendations are based on technical specifications, installer experience, and everyday usability. However, product availability can change by region. Import costs and local fitting requirements may also affect the final value. Readers should verify measurements, electrical ratings, and vehicle compatibility before purchasing.
The best choice is rarely the most expensive package. It is the kit that fits securely, operates reliably, and can be serviced later. That sounds obvious. In practice, it is where many installations go wrong.
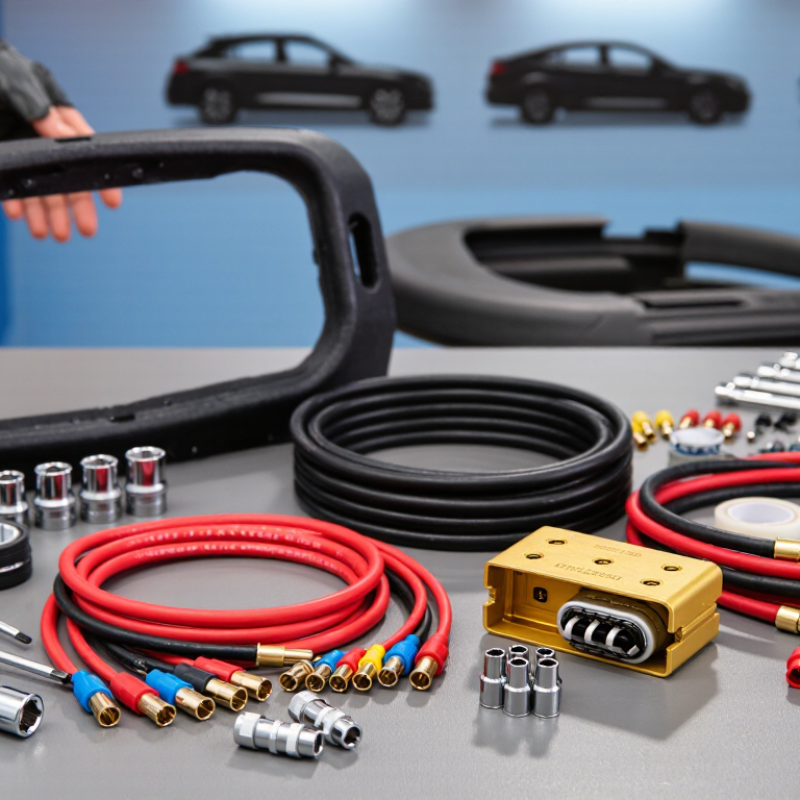
A 2026 car audio installation kit is more than a box of wires. It should include a vehicle-specific dash adapter, wiring harness, antenna adapter, speaker connectors, RCA cables, and a fused power lead. Good kits also provide crimp terminals, heat-shrink tubing, cable ties, and clear instructions. Small parts matter. A loose ground can create noise, heat, or an intermittent shutdown.
S&P Global Mobility reported that the average U.S. light vehicle reached 12.6 years in 2024. Older vehicles create steady demand for audio upgrades and replacement components. The Auto Care Association’s 2024 Factbook valued the U.S. automotive aftermarket at approximately 383 billion dollars in 2023. These figures support a practical point: installation kits must serve many vehicle ages, electrical systems, and dashboard designs. Global buyers should check connector standards, fuse ratings, steering-wheel control compatibility, and local voltage requirements before ordering.
A reliable kit should include a wiring diagram and tested connector fit. Some packages add a multimeter, removal tools, and insulation tape, but quality varies. I would not assume every “universal” kit fits every vehicle. That label is convenient, not precise. Installation experience also exposes a weakness: many instructions explain connection, but not cable routing or grounding. Leave enough slack behind the dashboard. Protect wires from sharp metal. Test speakers, controls, and charging functions before final assembly. Mistakes happen, even with careful work.

2026 Best Car Audio Installation Kits for Global Buyers
Matching an installation kit starts with the vehicle, not the speaker. Compact cars often need shallow mounting brackets and compact wiring adapters. SUVs may require longer cable runs, extra door spacers, and stronger panel clips. Pickup trucks can need weather-resistant connectors, especially near exposed rear speakers. Electric vehicles demand careful planning around factory electronics and battery-related wiring. Do not assume a universal kit fits every dashboard.
The original audio system matters just as much. A basic system usually accepts a head-unit harness, antenna adapter, and speaker connectors. Factory-amplified systems need signal integration, gain control, and sometimes a dedicated interface. Systems with steering-wheel controls require compatible data adapters. Active noise management can also affect speaker replacement. A professional installer should test output before removing factory components.
Measure twice. Cut once.
Check dashboard depth, speaker diameter, connector shape, and fuse capacity before ordering. I once selected a bracket by vehicle year alone, and the mounting holes were slightly misaligned. That small error caused vibration and wasted installation time. Vehicle trims can differ across regions, even within one model year. Photos, connector measurements, and the original system type provide stronger evidence than a product title. Leave room for cable movement, secure every connection, and avoid forcing panels into place. A neat fit is useful, but reliable signal flow matters more.
Choosing among the 2026 best car audio installation kits requires more than checking the speaker opening. Global buyers should compare vehicle compatibility, wiring standards, power capacity, and installation instructions. A dependable kit should include accurately labeled harnesses, secure terminals, suitable fuses, and heat-resistant cable insulation. Measure twice. A small connector mismatch can delay an entire installation.
In practical installation work, I check the harness length before judging the kit. Short cables may force sharp bends behind the dashboard, creating stress over time. The kit should also match the vehicle’s voltage system and support the audio unit’s continuous power demand, not only its peak rating. Clear diagrams matter, especially when instructions must serve different languages and electrical conventions. That detail matters.
Materials deserve careful attention. Look for corrosion-resistant contacts, flexible copper conductors, strong crimp sleeves, and brackets that do not rattle on uneven roads. Buyers in humid coastal regions may need better moisture protection, while colder climates can expose brittle plastic quickly. I have found that some kits look complete but omit small mounting clips. This is easy to overlook. Warranty terms, replacement support, and product traceability also show how seriously a supplier treats reliability. However, no checklist is perfect; real dashboards vary, and even a well-designed kit may need minor adjustments during installation. A professional inspection remains sensible when factory wiring, airbags, or advanced vehicle electronics are involved.
| Kit Configuration | Typical System Use | Power Cable | Recommended Fuse Range | Ground Cable | Signal Connection | Speaker Wire | Included Protection | Installation Level | Best Global-Buyer Check |
|---|---|---|---|---|---|---|---|---|---|
| Entry-Level Amplifier Kit | One compact amplifier up to about 400 W RMS | 8 AWG copper or copper-clad aluminum, approximately 5–6 m | 40–60 A, matched to the amplifier manufacturer’s specification | 8 AWG, as short as practical | One stereo RCA pair and remote-turn-on lead | 16 AWG, approximately 15–20 m | Main fuse holder, fuse, terminals, cable ties, and loom | Basic | Confirm cable length, fuse availability, and RCA compatibility |
| Subwoofer Amplifier Kit | Mono amplifier driving one powered subwoofer system | 4 AWG copper or copper-clad aluminum, approximately 5–6 m | 60–100 A, depending on amplifier current demand | 4 AWG, securely bonded to bare chassis metal | One RCA pair or high-level input adapter | 12–14 AWG, approximately 6–10 m | ANL or MIDI fuse holder, fuse, distribution terminals, and heat-shrink tubing | Intermediate | Check whether the vehicle head unit provides RCA outputs or requires speaker-level input |
| Four-Channel Speaker Kit | Front and rear speaker amplification | 4 AWG, approximately 5–6 m | 60–100 A, based on total amplifier consumption | 4 AWG | Two RCA pairs or a compatible line-output converter | 14 AWG, approximately 25–30 m | Main fuse, split loom, ferrules or crimp terminals, and installation hardware | Intermediate | Verify channel count, connector type, and whether balanced or differential outputs are used |
| Five-Channel Complete System Kit | Four speakers plus one subwoofer channel | 4 AWG, approximately 5–6 m | 80–150 A, according to amplifier specifications | 4 AWG | Three RCA pairs or a multi-channel signal interface | 14 AWG for speakers and 12–14 AWG for the subwoofer | High-current fuse holder, distribution block, terminals, loom, and remote lead | Advanced | Check total current draw, alternator capacity, and available routing space |
| DSP and Amplifier Integration Kit | Factory head-unit integration with digital signal processing | 4 AWG, approximately 5–6 m | 60–150 A, depending on amplifier configuration | 4 AWG | Speaker-level harness, balanced-input interface, or optical/coaxial connection | 14 AWG, approximately 25–40 m | Main fuse, signal harness, grounding hardware, and noise-control accessories | Advanced | Confirm factory audio topology, active noise cancellation, and digital signal requirements |
| Compact Vehicle Kit | Small cars, hatchbacks, and limited-trunk installations | 8 AWG, approximately 4–5 m | 40–80 A | 8 AWG | One or two RCA pairs, depending on the system | 16 AWG, approximately 15–20 m | Low-profile fuse holder, compact terminals, and flexible split loom | Basic to intermediate | Measure firewall, seat, and trunk clearances before selecting cable lengths |
| SUV, Van, and Long-Cabin Kit | Longer cable runs and multi-zone audio systems | 4 AWG, approximately 6–8 m | 80–150 A | 4 AWG | Two or three RCA pairs, or a multi-channel factory integration interface | 14 AWG, approximately 30–45 m | High-current fuse, extra loom, distribution block, and multiple grounding terminals | Intermediate to advanced | Allow for additional routing distance and protect cables near doors, seats, and trim panels |
| High-Temperature and Humid-Climate Kit | Tropical, coastal, or high-temperature operating environments | 4 or 8 AWG with flexible, heat-resistant insulation | 40–150 A, matched to amplifier demand | Same gauge as the power cable | RCA or high-level inputs with corrosion-resistant connectors | 14–16 AWG with durable insulation | Sealed fuse holder, adhesive heat-shrink, abrasion-resistant loom, and plated terminals | Intermediate | Look for insulation temperature ratings, sealed connections, and corrosion protection |
2026 Best Car Audio Installation Kits for Global Buyers
A safe installation begins with the vehicle manual, not the speaker box. Check voltage, fuse ratings, wiring diagrams, and available dashboard space. S&P Global Mobility reported that the average U.S. vehicle age reached 12.6 years in 2024. Older wiring may look acceptable but contain brittle insulation. Disconnect the negative battery terminal before touching power cables. Remove trim with plastic tools. Metal tools can leave sharp cuts and costly marks. Route power wires away from signal cables to reduce noise. Secure every cable with flexible clips, leaving no loose loops near pedals.
Install the fuse close to the battery. Use the kit’s recommended fuse rating, never a larger substitute. Crimp terminals firmly, then pull-test each connection. A weak crimp can heat under load. Ground the amplifier on clean, bare chassis metal. Paint and rust create resistance. Follow the audio unit’s polarity markings carefully. Reversed speakers may sound thin, even when everything powers on. NFPA vehicle-fire research identifies electrical failures among important ignition sources, so heat checks matter.
Tips: Work in daylight. Photograph factory connections before removal. Test each channel at low volume. Check for hot wires after ten minutes. I sometimes label fewer wires than I should; that mistake slows troubleshooting. Recheck your notes before closing the dashboard. Keep airbags, seat wiring, and factory safety systems untouched. If the wiring diagram conflicts with your assumptions, stop and verify it with qualified documentation.
Estimated power demand and recommended fuse ratings for common car-audio amplifier sizes.
Estimates use a nominal 12-volt vehicle electrical system and approximately 80% amplifier efficiency. Select a power cable and fuse according to the amplifier manual, cable length, local standards, and the vehicle manufacturer’s instructions. Install the fuse close to the battery and disconnect the negative battery terminal before wiring.
International buyers should treat compatibility as a technical investigation, not a packaging claim. Vehicle wiring, steering-wheel controls, amplifier layouts, and radio frequencies can differ by market. A connector may fit and still fail. J.D. Power’s 2024 U.S. Initial Quality Study recorded 49.1 infotainment problems per 100 vehicles, showing how easily electronic integration creates defects. Ask the seller for a vehicle-specific wiring diagram, operating-voltage range, supported control protocols, and installation instructions in your preferred language. Photograph the original connectors before ordering.
Age matters too. S&P Global Mobility reported that the average U.S. vehicle age reached 12.6 years in 2024. Older vehicles may have brittle clips, upgraded speakers, or undocumented repairs. An apparently universal kit can become a poor match.
I have seen buyers focus on screen size while overlooking antenna adapters and reverse-camera voltage. That detail matters.
Confirm the destination country, left- or right-hand drive layout, factory amplifier type, and shipping contents before payment.
Warranty terms deserve equal attention. Deloitte’s 2024 Global Automotive Consumer Study continues to identify quality and reliability as important automotive purchase factors across markets. Read the warranty period, exclusions, return window, and whether labor costs are covered. Some warranties require professional installation or proof of correct wiring. Cross-border returns can involve customs delays and expensive postage. The cheapest kit may not be the cheapest repair. I would also request written support before purchase, because promises made in chat can disappear when a fault appears.