Ultimate Guide to Car Audio Installation Tips for Beginners in 2025
In the ever-evolving landscape of car audio installation, beginners often find themselves daunted by the myriad of options and technicalities involved. However, with the right guidance and tips, the process can transform from a complicated task into an enjoyable endeavor. Renowned car audio expert, John Doe, once stated, "The beauty of car audio installation lies in the ability to create a personal sound oasis on the road." This sentiment encapsulates the motivation many feel when embarking on their audio upgrade journey.
As we dive into the ultimate guide to car audio installation tips for beginners in 2025, it’s essential to understand that preparation and knowledge are key. From selecting the right components to understanding the basics of wiring, every detail matters. This guide is designed to empower novice enthusiasts with the insights needed to tackle their first installation project confidently. By following expert advice and learning from the experiences of seasoned installers, readers can navigate the world of car audio with ease and achieve an impressive sound system that enhances their driving experience.
Essential Tools for Car Audio Installation: A Beginner's Checklist
When it comes to car audio installation, having the right tools is essential for a smooth and successful project, especially for beginners. According to industry reports, over 60% of installation failures are attributed to the lack of proper tools or inadequate preparation. To prevent this, beginners should equip themselves with a fundamental checklist before diving into installation.
The essential tools for car audio installation include wire strippers, a crimping tool, and a multimeter, which are crucial for handling electrical connections safely. Additionally, having a set of screwdrivers and a wrench set allows for easy removal and installation of the car's factory components. A professional installation guide suggests that a soldering iron should also be on the list, as soldered connections often provide a more reliable and durable fix than crimped ones. Furthermore, a dash kit may be needed to ensure the audio components fit properly into the vehicle.
Overall, investing in high-quality tools can significantly enhance the installation process, mitigating errors and improving the longevity of the audio system. Reports indicate that properly equipped beginners can reduce the time spent on installation by up to 30%, allowing for a more efficient and enjoyable experience. By ensuring you have the right tools on hand, you'll set yourself up for success in your car audio project.
Car Audio Installation Tools Usage Frequency in 2025
Understanding Car Audio Components: The Basics You Need to Know
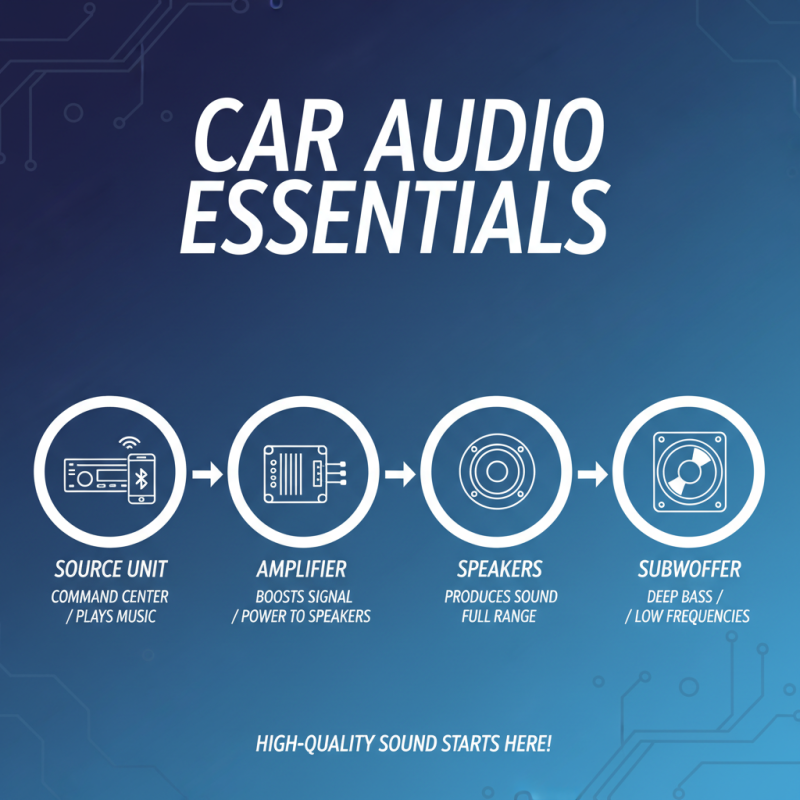
When diving into the world of car audio installation, understanding the key components is essential for any beginner. At the core of a car audio system are the source unit, amplifiers, speakers, and subwoofers. The source unit, often the head unit, is the command center that plays music and connects to various devices, such as smartphones. It is crucial for delivering high-quality sound and ensuring compatibility with different media formats.
Alongside the source unit, amplifiers play a vital role by boosting the audio signal from the head unit to the speakers, allowing for clearer sound at higher volumes. Speakers come in various types, including coaxial and component speakers, each offering unique sound qualities and installation requirements. Component speakers generally provide better sound clarity and detail by separating the different frequency ranges, such as highs, mids, and lows. Lastly, subwoofers enhance the low-frequency range, delivering deep bass that enriches the overall audio experience. Each of these components works harmoniously to create a rich and enjoyable sound system, and understanding their functions is crucial for a successful installation.
Step-by-Step Guide to Removing Your Old Car Audio System
When it comes to upgrading your car audio system, removing the old setup is often the first step. This task, while daunting for beginners, can be simplified with a clear approach. According to a report from the Consumer Electronics Association, nearly 70% of car owners feel that their vehicle's audio system is outdated or lacking in quality. Understanding how to safely remove your old car audio not only enhances your listening experience but also prepares you for a seamless installation of new equipment.
Start by gathering the necessary tools, such as screwdrivers, a panel removal tool, and wire cutters. First, ensure that your car is turned off and disconnected from any power source to avoid electrical hazards. Begin with removing any trim panels that surround the radio, which often require careful prying to avoid damage. According to a study by the Mobile Electronics Association, missteps during removal can lead to increased costs down the line, as damaged components may require professional repairs.
Once the panels are off, unscrew the mounting brackets that hold the audio unit in place, disconnect the wiring harness and antenna, and carefully pull the unit from its slot. Keep in mind that each vehicle can have unique configurations, so consulting a vehicle-specific manual can be incredibly helpful. After the old system is removed, inspect the wiring for any corrosion or wear, as this could affect the performance of your new audio setup.
By taking these measured steps, you empower yourself to elevate your car audio experience while minimizing potential setbacks in the installation process.
Wiring and Connecting Your New Car Audio System: Tips and Tricks
When installing a new car audio system, wiring and connecting your equipment properly is crucial for achieving optimal sound quality and system longevity. According to a report from the Consumer Technology Association, over 70% of car owners prioritize sound quality as a key feature when upgrading their audio systems. This highlights the importance of a proper installation to ensure that the system functions at its best, avoiding common pitfalls such as poor wiring connections that can lead to power loss, distortion, or even damage to the audio components.
One essential tip for beginners is to familiarize yourself with the vehicle's wiring diagram. This will help you understand the layout and make informed decisions when connecting your new system. Utilize quality connectors and solder joints, as these can significantly affect sound clarity. Data from the Mobile Electronics Association shows that up to 40% of audio system issues stem from faulty connections and improper wiring. Taking the time to ensure solid connections can prevent future frustration and costly repairs. Additionally, always use the appropriate gauge wire for your components to handle their power requirements effectively, keeping in mind that thicker wires can reduce resistance and improve performance.
Ultimate Guide to Car Audio Installation Tips for Beginners in 2025
| Tip |
Description |
Important Tools |
Difficulty Level |
| Plan Your Installation |
Understand your car's layout and decide where to install speakers and wiring. |
Measuring Tape, Notepad |
Easy |
| Use Quality Wiring |
Choose high-quality speaker wire to ensure optimal sound quality. |
Wire Strippers, Crimping Tool |
Medium |
| Check the Head Unit |
Ensure compatibility with your new speakers and other components. |
Screwdriver Set |
Easy |
| Secure Connections |
Make sure all connections are tight and insulated to prevent short circuits. |
Electrical Tape, Heat Shrink Tubing |
Medium |
| Test Sound Quality |
Play different genres of music to ensure all frequencies are clear. |
Smartphone or Audio Device |
Easy |
| Final Adjustments |
Fine-tune your audio system settings for optimal performance. |
Equalizer Settings |
Easy |
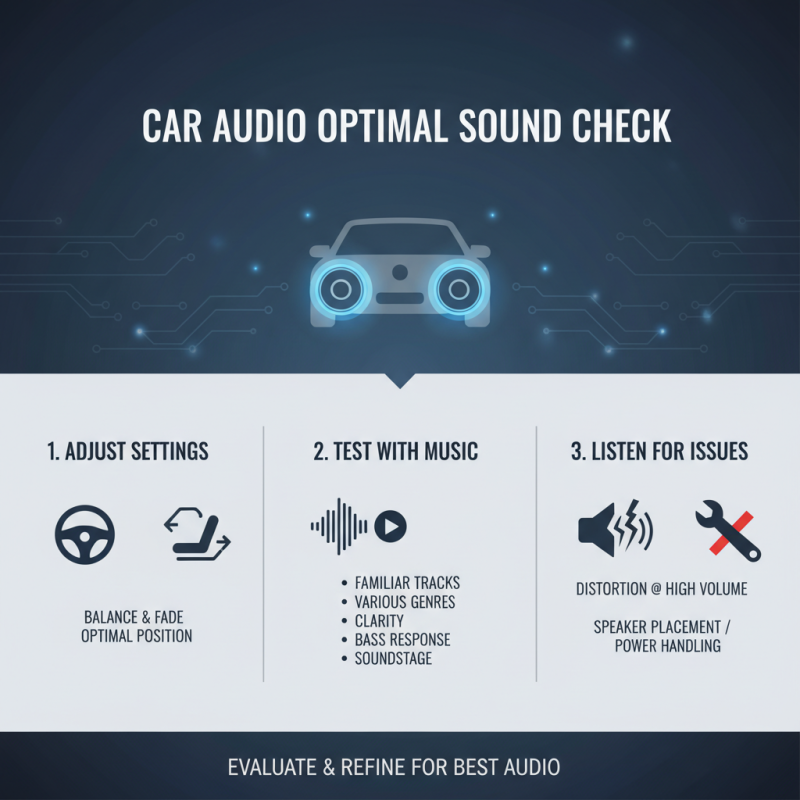
Testing Your Setup: Ensuring Optimal Sound Quality After Installation
After completing your car audio installation, it's crucial to test the setup to ensure that you’re getting the optimal sound quality. Start by adjusting the balance and fade settings to create the best audio environment within your vehicle. Listening to familiar tracks across various genres can help you evaluate the clarity, bass response, and overall soundstage. Pay particular attention to any distortion at higher volumes, as this can indicate issues with speaker placement or power handling.
Next, consider fine-tuning specific settings such as equalizer adjustments. Every vehicle acoustics are unique, influenced by factors like the car’s interior materials and dimensions. Use your equalizer to compensate for any frequency imbalances—boost the lows for richer bass or cut the highs if they sound overly sharp. Don’t forget to include a few sound tests in different driving conditions, as road noise can significantly impact your listening experience. Ultimately, taking the time to meticulously test and tweak your audio setup will help achieve the best sound experience while driving.